Everything I Wish I Knew When I Started Using Framer
I’ve recently started using framer for my Capstone project at Carnegie Mellon. Suffice to say, I am definitely in the Framer cult now despite some original hesitation.
I’m writing this quick and dirty guide for my teammates, but I figured it might be a useful post for the UX Community too. This is mainly a collection of the gotchas and things I learned when transitioning from Sketch and InVision to Framer.
I’m going to write this for designers who predominantly do wireframes and prototyping with Sketch and InVision.
…but first let me give a little backstory.
Why I Haven’t Used Framer Until Now
The simple answer is that if I wanted to do high fidelity or functional prototyping, it felt pointless to do it in Framer.
For a long time, it seemed like it was inevitably a lot of work to make something truly functional in Framer. For the same amount of effort, you could make a truly functional prototype in HTML, CSS, and JavaScript.
Take Android Tabs example by Jorn Van Dijk. It’s beautiful, and it’s functional. However, the effort put into it seems counterproductive. Its too much work to design, and too little to turn into production code.

In order to make a truly modular and functional Framer prototype like the one above, it used to take a lot of lines of code and styling. It certainly wasn’t fast. If you did the same thing in HTML, CSS, and JavaScript, you’d be done in the same amount of time. Plus, you’d have a repository you could hand over to a developer. At smaller shops, you might even have production code.


The inneficiency wasn’t something to take lightly. When prototyping, the strategy should always be to make a facade, and make the one necessary to suspend disbelief. You should make a prototype with as much fidelity as necessary, but also as quickly and efficiently as you can.
**A lot of people will object and point to the fact that you can import Sketch files and components in Framer. My issue is, it’s kind of clunky and still not as fast as HTML prototyping in my opinion.**
To design in Framer, you absolutely don’t have to do it this way.
So What Changed?
You should make a prototype with as much fidelity as necessary, but also as quickly and efficiently as you can.
There’s been some interesting developments both for the Framer product, and within the Framer community since I first tried to use this tool in 2015. There’s 2 changes in particular that are important.

At some point, Framer introduced the Design Tab. It works really well. Sketch has an amazing flow and Framer is comparable. In fact theres some truly nice things about Framer’s Design tab and features. The one major feature it’s missing is Symbols. This was a dealbreaker for me as someone who uses them religiously in Sketch.
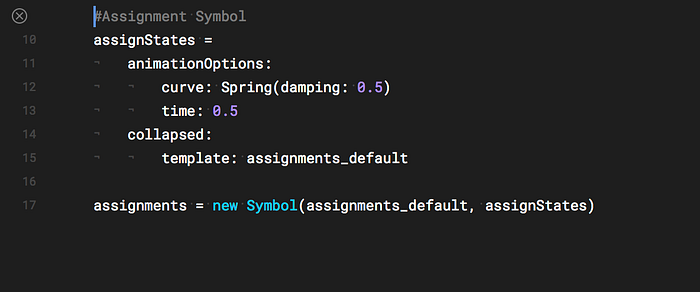
The single thing that put Framer over the edge for me as an amazing prototyping tool was one community contribution. Lukas Guschlbauer made a plugin where you can create Symbols in Framer and manipulate them in code. For those who do functional programming, you can take a design component, and treat it like a class.
It means that with some basic JS programming, I can take something like this from the design tab, and easily generate a list of items, and populate them with real data.
So…with these product improvements, Framer is amazing. You can work very fast and make things very functional.
Okay I’ll Cut to the Chase.
What do I Need to Know to Move from Sketch to Framer Design Tab?
There’s a lot of “gotcha’s” in Framer design tab that might be a little frustrating at first. However, in my experience the differences seem intentional and useful. I’ll try to hit the big ones one by one.
There Are No Artboards
There are no Artboards in Framer, instead you use frames. It gets the job done just as well. Furthermore, these things have some cool attributes that I’ll explain in the next section.
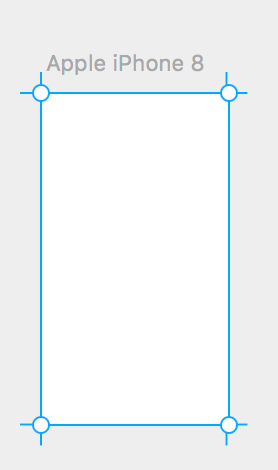


So, no Artboards, but you can do the same thing with the same amount of clicks in the Design Tab. If you put elements inside a phone screen, its part of that frame and gets dragged around just like in Sketch.
There Is No Concept of a Group.
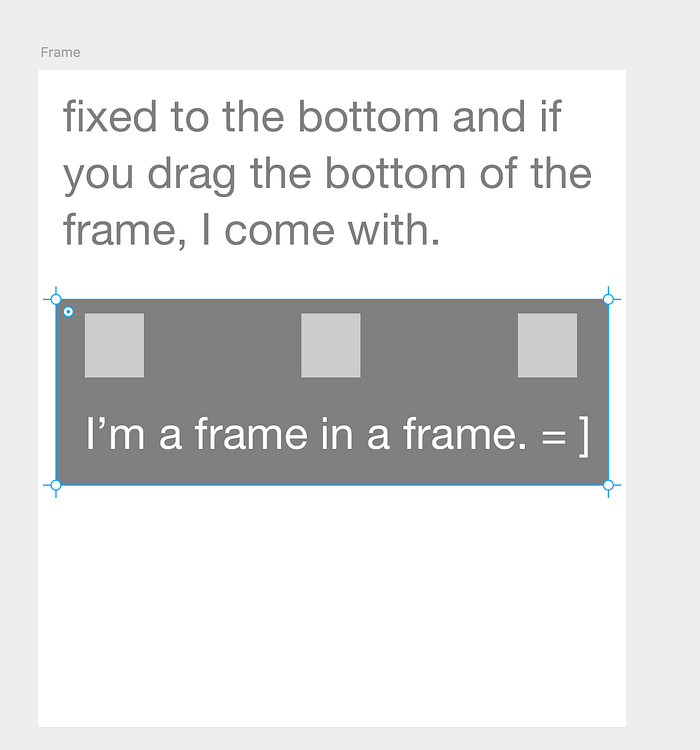
Framer doesn’t have groups. You can select elements and CMD-G and nothing happens. At first this seems like oversight, but Framer actually does something cleverly redundant. It uses frames to group. Thats right, the same way you make an “Artboard” is how you make a “group.” What this means is, a frame is basically a way to group anything.
Basically if you create a frame and drag it over elements, you’ve effectively grouped any element within the box.


The implementation has some interesting affordances too, because it also works backwards. If you move an item over a frame, the item automatically goes into the frame. This can be a little annoying sometimes, but really nice once you understand it and utilize it.
You can put frames in frames too. Thats exactly what you’re doing when you put a frame inside what you perceive of as an “Artboard.” You can nest: it’s frames all the way down.

It’s frames all the way down.
If you start stretching and scaling your frames, things might behave weird. It’s not a bug; it’s a feature.
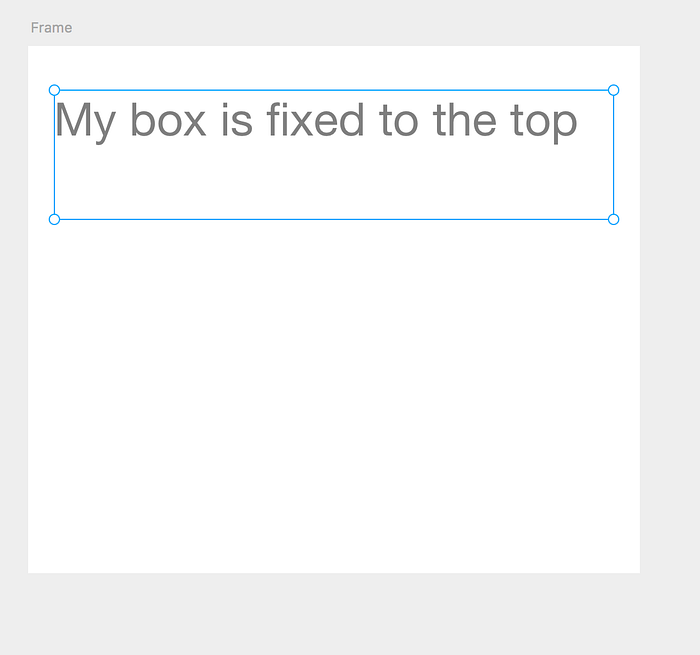
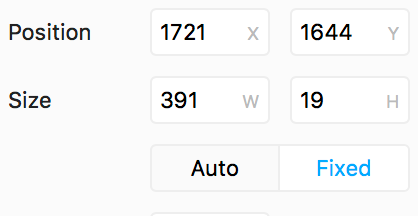
It’s Responsive By Default
If you resize screens, things have a tendency to unpredictably resize sometimes. Framer automatically tries to make things responsive, and sometimes it fails. However, it’s right more often than wrong. You simply need to recheck your elements. Once you understand how it implements responsiveness, it’s actually really nice.

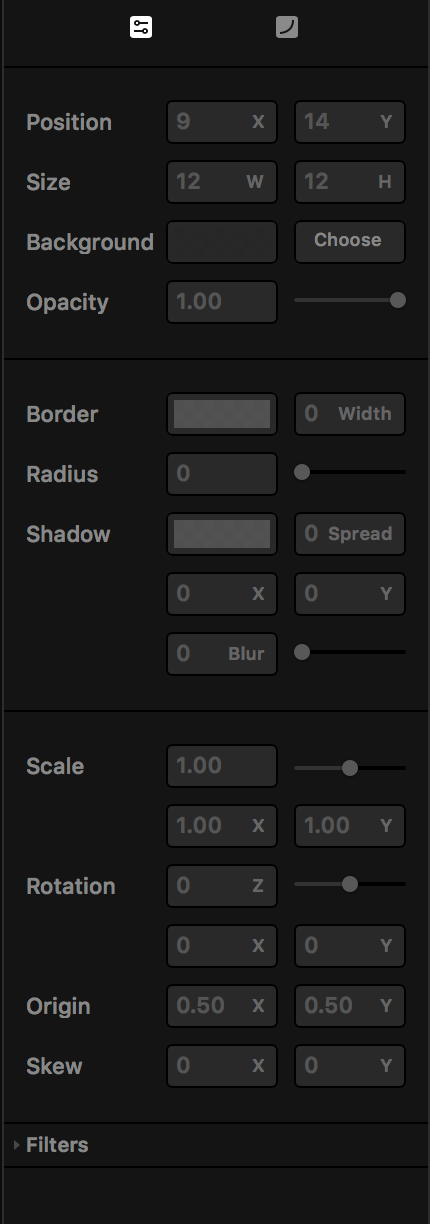
All of the responsiveness is controlled and described by this box. It tells you where things are locked when you scale. In the image above, the element in the box scales proportionally to the frame.
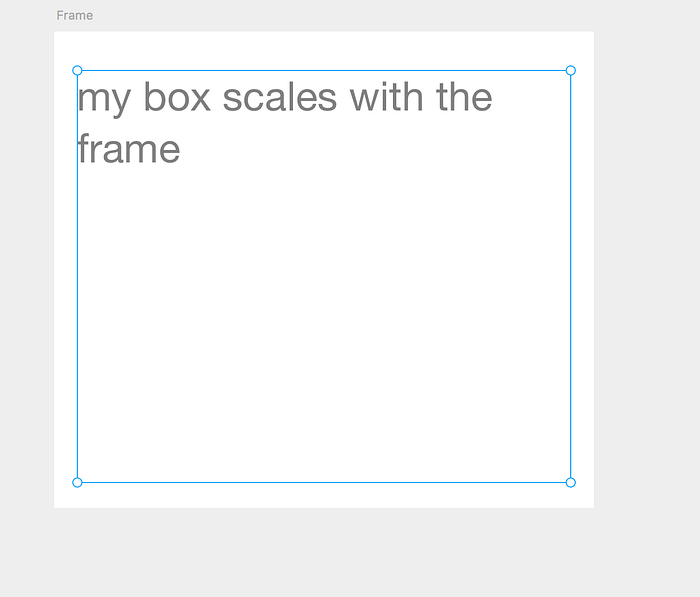
So you may get the idea by now. To recap, Framer makes things responsive by default, and tries to be smart about snapping things.


Alignment is Super Easy Inside Frames
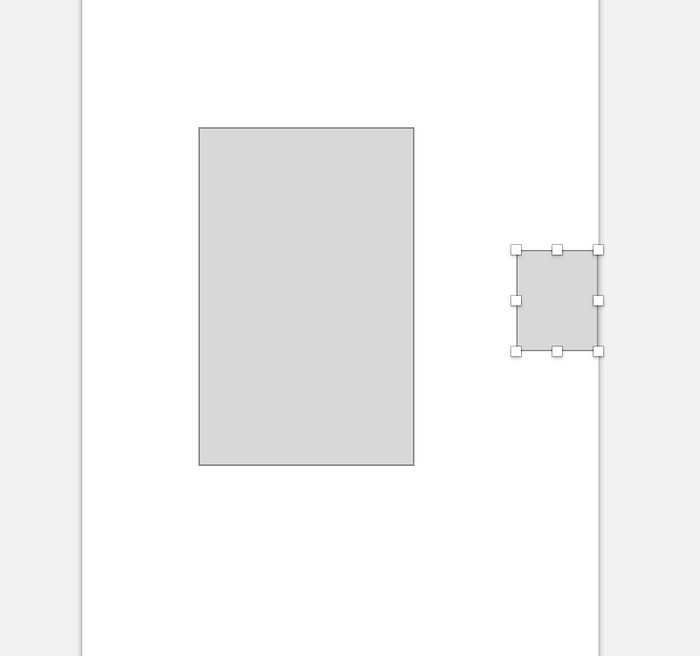
In Sketch you tend to rely on Smart Guides to make sure you align things to the center when you’re nesting. You have those in framer too (click an element. Hold the alt key, move the mouse around to see how far away things are in pixels).
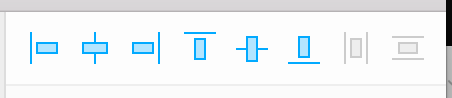
Both Framer and Sketch have quick align tools in the top of the inspector. The differences is that the alignment buttons are more likely to work as you’d intend them to in Framer.
If you use the alignment tools, your element will align with respect to its first parent frame.
If you try to acheive the same functionality with groups in Sketch, you won’t get the same results. The alignment tool always aligns your item with respect to the artboard in Sketch. The result is that the tool is only useful for certain things in Sketch, but super powerful in Framer.
Here’s what Sketch does:

Text Boxes Behave Different
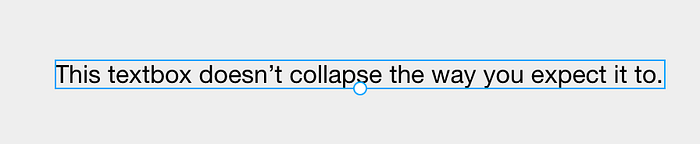
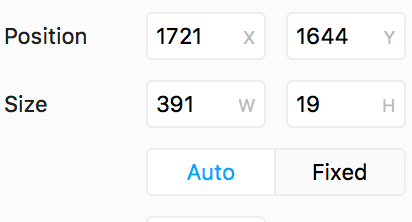
Normally you make a textbox in Sketch, you add type to it, and you drag it around and text collapses. To get this behavior, you have to change the Textbox from “Auto” to “Fixed” in the inspector.
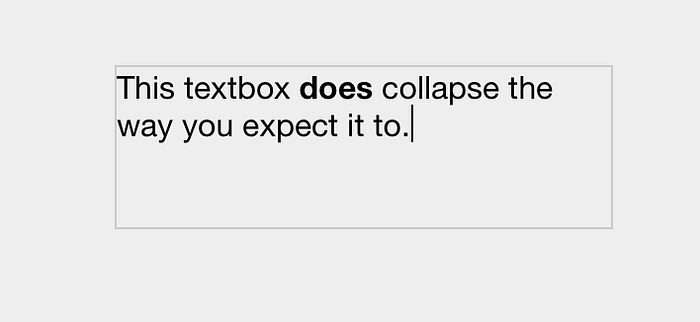
I will say, the auto method is kind of nice for keeping your textboxes as small as they need to be, and allowing you to scale type up. When you first create a textbox, you generally want to get the font size correct first, so this is ideal and requires fewer clicks.
Eyedropper Tool Actually has a Key Command
I never found the key command for Eyedropper in Sketch, which can be annoying. In Adobe products, you simply use the i key. In Framer, you can do ^C (control-C on Mac), and you’ll get an eyedropper. It’s super convenient to have that back.
The Let-Downs
So what’s not better in Framer?
I’d say the Path Tool mainly. Other vector manipulation tools also aren’t there AFAIK. You may find yourself missing the Pathfinder functionality: a way to merge vectors and make sure they merge the way you want them to. Simply put, Framer isn’t for manipulating Vectors. However, Sketch isn’t really primarily for that either. Honestly if you want to manipulate paths and vectors, use Adobe Illustrator like a real pro.
**Also sometimes you accidentally zoom in on your canvas and then you’re. unable to see your frames anymore. You end up panning around to find them again. This is really annoying, and AFAIK there isn’t a way to reorient or pan back to your frames. I usually just save and reopen. Please comment if you know how to resolve this. ❤️ **
- ^ CMD-1 will bring you back to your canvases, thanks Radha Nath!
So How Can I Get InVision Functionality
You can stitch screens up in Framer pretty easily. You do it with very minimal CoffeeScript. For many designers, this seems scary at first but most of the code you write is super simple.
Code Basics
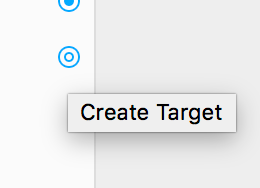
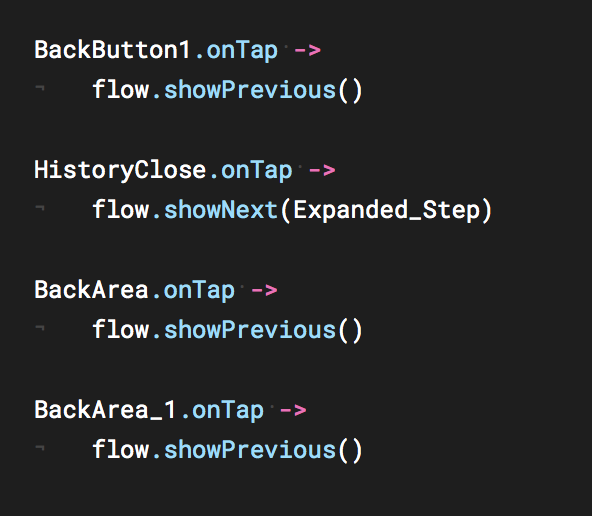
Yes making things functional in Framer can be really simple and its Library has some really nice out-of-the-box components. The first time you try this, it probably wont work though. The reason is that you need to give an element at target to make it interactive.
What if I Want to Write As Little Code As Possible?
You can actually acheive a lot of the code functionality using sidebars. I recommend Framer tutorials that come with the product, as they explain how to use this thoroughly. I personally don’t use this, but you can.
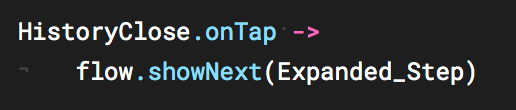
Screen Stitching Basics
So for stitching screens together, the best tool for the job is typically FlowComponent.
To use it, you basically instantiate it at the top and give it the default screen as so:
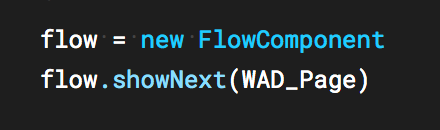
Once you do this you’re cooking with grease and can make elements interactive (just don’t forget to give buttons and screens a target 😉)
Make Part of a Screen Scroll
Theres a ScrollComponent to make a frame and it’s contents behave like a body that scrolls.

In fact theres a lot of these components, so if you’re curious about more you should refer to Framer Documentation.
Animation
Animation is straightforward in Framer, and you don’t necessarily have to write code. The Sidebar introduced earlier is actually very nice for this. If you want to animate something, it has to happen in the context of an event. It makes sense though right? Things don’t just move without something triggering it.
So you’ll see a little “notch” when you have an animation:
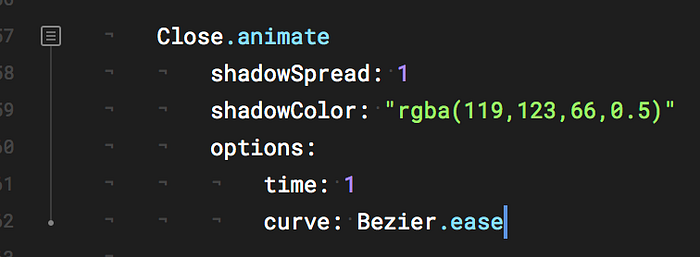
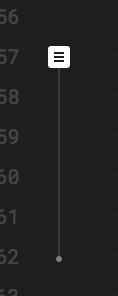
Once you click the “notch” you’ll get animation options in the sidebar. Its a list of everything you can do.
You can also tab over to the curve functions to fine tune the animation. Its an affordance you’d expect in any tool that allows you to animate.

Coding Power Features
So your code can get pretty spaghettified if you just have a bunch of two-liners describing things here and there. You can definitely clean that up.
If you know how to program and want to, its totally possible. Framer uses CoffeeScript out of the box, so you can use all of the nice things like arrays, for-loops, and functions. Theres ES6 functionality too. Yes, that means you can use classes, which can be really nice.

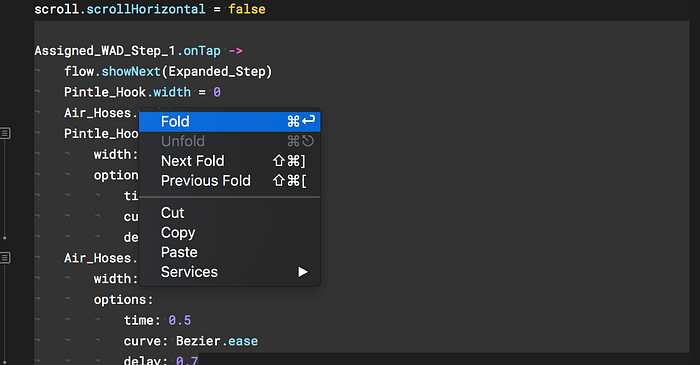
Theres also an affordance to “fold” code which can help tidy things up.

Thats All Folks
I’ll wrap this up here, but this list is definitely not exhaustive. It’s just the things I wish I knew a week ago. If anyone is reading this list and wants to add to this, please comment!
I am someone who used to use Sketch and InVision, or Web Prototyping exclusively. I was a design 🦄 and I always saw Framer as a middleman that couldn’t do both effectively. With some product updates and plugins, that isn’t the case anymore (When Framer X comes out, there may not even be a debate anymore). If you take a hybrid approach to designing and prototyping, Framer is really empowering.
You can get totally immersed if you’re a go-between visual designer and developer. It’s like work suddenly becomes a match of StarCraft where you’re using all of your brain all of the time. It’s great, and it gets you into a healthy and productive flow. If you aren’t a hybrid designer, I suspect Framer will quickly aid you in becoming one.
